The post Three new ways to use your Airthings Wave appeared first on Airthings.
]]>The Airthings Dashboard is an online platform that provides quick access to view, customize and analyze sensor data from multiple Airthings devices. Additionally, Airthings recently integrated Wave (the only battery operated, Smart Radon Detector on the market) with IFTTT to provide third-party product integrations and new features. With an IFTTT connected Wave, users can now customize their experience. Set the device to turn Hue lights red when Radon levels are high, turn on a fan or even open a window. Finally, Airthings now offers Smart Home Skills for integrating your Airthings Wave with Amazon Alexa’s voice controls. Ask Alexa to report radon levels in different rooms of your home. Airthings’ integration with Alexa and IFTTT, as well as the addition of the Airthings Dashboard, gives you a complete personalized system to control your Airthings devices.
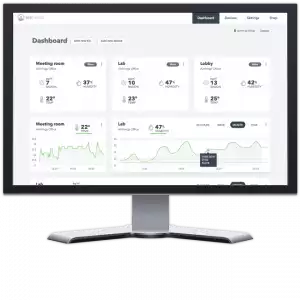
Continuous monitoring of IAQ is necessary to minimize health effects and increase overall wellbeing. The Airthings Dashboard is a free feature that accompanies Airthings Wave and provides online access to detailed sensor information as well as the ability to export data and manage notifications. Users now have full visibility into their Radon, humidity and temperature levels and can easily analyze historical data, monitor and compare multiple rooms/devices and identify ways to optimize ventilation and overall Indoor Air Quality. With customizable tiles that illustrate sensor data or a device summary, users can personalize the dashboard to fit their needs. Device Tiles summarize the data from all sensors, while Sensor Tiles provide a graph of your levels over time for each individual sensor.
“As our company moves into smart home solutions, we expand our offerings to better serve our customers and provide a broader view of data and analytics,” said Oyvind Birkenes, CEO of Airthings. “The dashboard will allow users to analyze and export data through a clean, easy-to-use interface, truly elevating the entire experience of Airthings devices. In addition, our IFTTT ecosystem integration enables devices from different vendors to talk to each other to make our homes smarter and healthier.”
With IFTTT, users can create or access useful recipes for their Airthings Wave to follow. For example, users can receive an email notification or a calendar event when humidity or temperature levels decrease beyond comfort or when Radon increases to dangerous levels in the playroom or office, just to name a few. Both the IFTTT and Alexa integrations and Dashboard are free for the consumer and will pair with all future Airthings products.
“We will do anything we can do to help people easily monitor and understand Radon. The more people that monitor their Radon, the more lives we are able to save since Radon is the second leading cause of lung cancer among non-smokers in the United States,” said Birkenes.
Do you want to start breathing better air? Buy a radon detector today.
The post Three new ways to use your Airthings Wave appeared first on Airthings.
]]>The post Read sensor data from Airthings Wave using Raspberry Pi appeared first on Airthings.
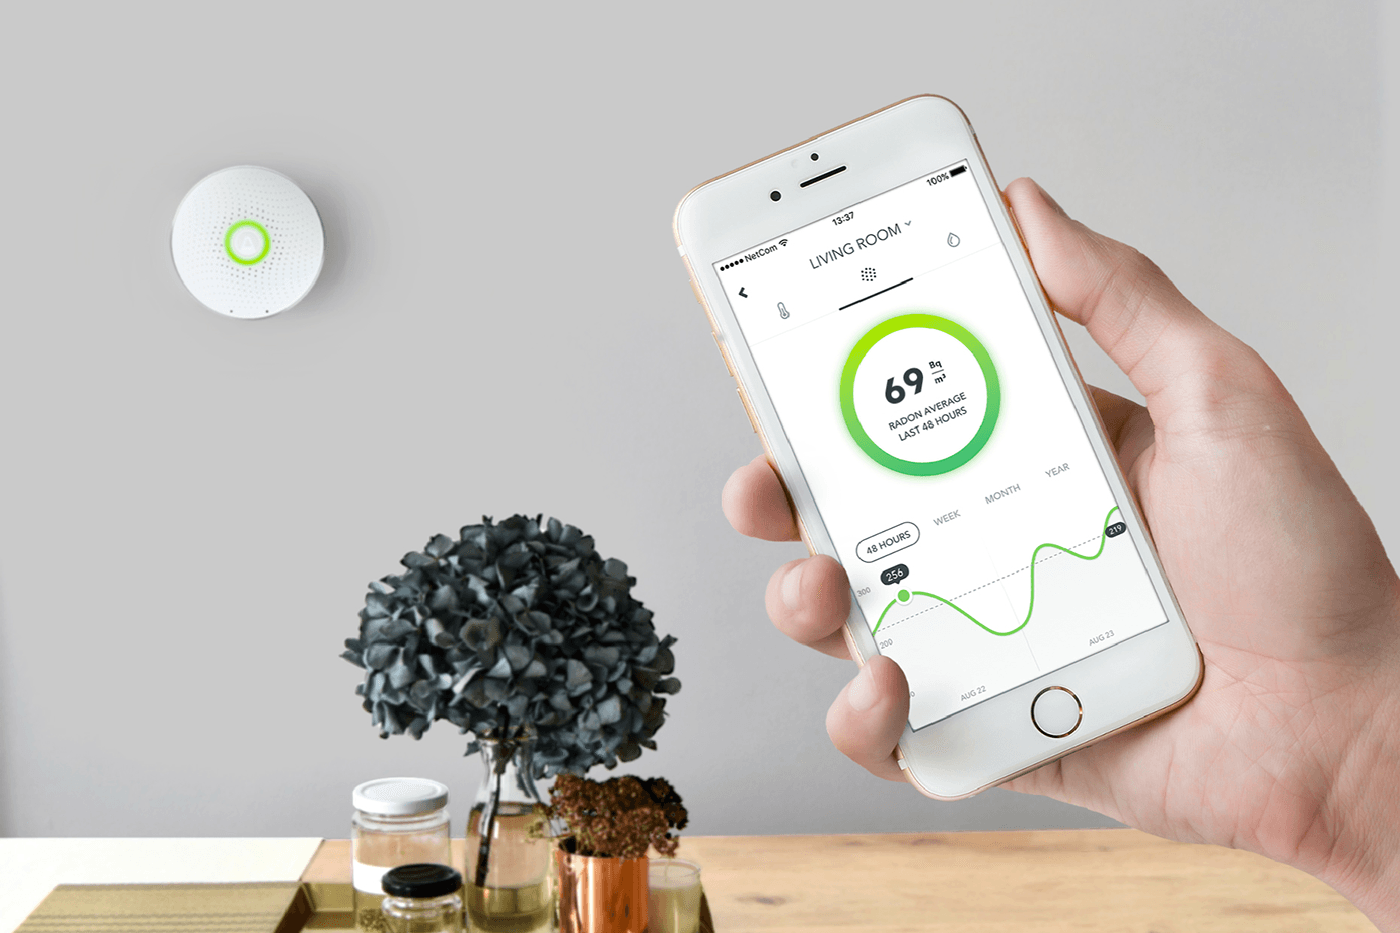
]]>Airthings Wave is a smart radon detector with quick and accurate results on your smartphone. Additionally, you can simply wave in front of the detector to get a visual indication of your radon levels.
Setup Raspberry Pi
The first step is to setup the Raspberry Pi with Raspbian. An installation guide for Raspbian can be found on the Raspberry Pi website. In short: download the Raspbian image and write it to a micro SD card.
To continue, you need access to the Raspberry Pi using either a monitor and keyboard, or by connecting through WiFi or ethernet from another computer. The latter option does not require an external screen or keyboard and is called “headless” setup. To access a headless setup, you must first activate SSH on the Pi. This can be done by creating a file named ssh in the boot partition of the SD card. Connect to the Pi using SSH from a command line interface (terminal):
$ ssh [email protected]
The default password for the “pi” user is “raspberry”.
Install the BLE Python wrapper
The next step is to install the bluepy Python library for talking to the BLE stack. For the current released version for Python 2.7:
pi@raspberrypi:~$ sudo apt-get install python-pip libglib2.0-dev

pi@raspberrypi:~$ sudo pip install bluepy
Further installation documentation can found at https://github.com/IanHarvey/bluepy
Read sensor data from the Airthings Wave
To read the sensor data from the Airthings Wave, you need the BLE address of the device. If your device is paired and connected to a phone, you may need to turn off bluetooth on your phone while using these scripts.
Next, make sure the BLE interface is turned on:
pi@raspberrypi:~$ bluetoothctl

[bluetooth]# power on
To verify this, look for “Powered: yes” after issuing the following command:
[bluetooth]# show
Exit the bluetoothctl with
[bluetooth]# quit
Download the two Python scripts by doing the following:
wget airthings.com/tech/find_wave.py

wget airthings.com/tech/read_wave.py
Run the Python script “find_wave.py” to find the BLE address of your device:
pi@raspberrypi:~ $ sudo python find_wave.py
The output will display all Airthings devices within range. The BLE address is on the form “xx:xx:xx:xx:xx:xx” and the serial number (SN) should match the SN number on the backside of your Wave. Exit the script using “Ctrl + c”. If you have many devices, you may run the command with a filter to find your BLE address:
pi@raspberrypi:~ $ sudo python find_wave.py | grep [SN]
where you replace [SN] with the serial number on the backside of your Wave.
Now you are ready to read the sensor data from the Wave. Run the attached script:
pi@raspberrypi:~ $ python read_wave.py xx:xx:xx:xx:xx:xx
where xx:xx:xx:xx:xx:xx is the BLE address you found using “find_wave.py”. The sensor data should now be printed. Exit the script using “Ctrl + c”.
Final notes
The “find_wave.py” is using advertising data from the Wave to find its BLE address. Only one unit can be connected to the Wave at a time. This means that these scripts only can read the Wave data while your phone is not connected to the Wave, and vice versa.
The radon measurements are given in Bq/m3 and the maximum value that can be read by the script is 16383 Bq/m3. Note that the first radon measurements are only available one hour after the batteries have been inserted. The radon long term measurements are averaged from the batteries are inserted up to one year.
This guide has been tested with Raspberry Pi 3 Model B, Raspbian Stretch (November 2017), bluepy 1.1.4 and Python 2.7.13.
Let us know how it went on our facebook page! And what you want to see next.
The post Read sensor data from Airthings Wave using Raspberry Pi appeared first on Airthings.
]]>The post How to Make a Smart Home Device appeared first on Airthings.
]]>Airthings launched a revolutionary product, Wave, at CES in Las Vegas on January 5, 2017. Their cutting-edge technology was crafted under their business philosophy. Established in 2008, with the idea that technology should be used to “promote, maintain, and improve the health and safety of everyone”, a prominent statement on their website. The Airthings team consists of tech professionals, scientists and engineers, all of whom are the springboard towards reaching a common goal: to inform people about radon, and create accessible, affordable technology to safeguard their homes.
I had the privilege to gain insider access into the brilliant minds of those in-the-know at Airthings. They graciously provided the blueprint to creating a smart home device. I spoke with key people in various parts of the innovation and creation processes, and have compiled their knowledge into a workable template, which can be transposed into the creation of other smart home devices.
Evaluate User Needs and Specific Market
First and foremost, it is important to identify a gap in the market. For Airthings, it was a proper way to detect radon. Sure, there are currently ways to ensure that an area or house are within a safe level. The most common of which is the use of charcoal canisters. A container with activated charcoal is placed into the area to be tested, and are left for a set amount of time, afterwards they are sent to a lab for analysis. Unfortunately, this method provides only a short-term view of radon levels. Therein lied the aforementioned gap in the market.
Of course, once the idea was established, countless hours of market research were a requirement. Airthings determined a few things were necessary in order to see their product succeed. Keeping it simple was of the utmost importance — as it should be with any home device. People are not interested in anything complicated, finicky, or counter-intuitive. Rather, they want a streamlined product that does exactly what it states, without any unnecessary distractions. That is to say, the radon detector does not include other popular sensors because they already exist on the market. The first smart home product you create should be as simple as possible, while still maintaining its necessary value.
Connect with Those Who Have the Necessary Skills
Once the product idea has be concretely conceptualized, the next step is to connect with the right people. In the case of Airthings, they decided to gather with the brightest minds in the industry — which included people outside of their core group. By compiling a list of necessary experts, they were able to work closely with the people that would produce the best output.
They made the tough decision to team up with a group outside of their immediate group of employees. It was an important, but necessary decision. EGGS Design, Norway’s leading tech designers were the perfect match. Their impressive design skills and track record were key in Airthing’s success. The investment was more than worth the initial cost. It may be a daunting number to work with the best in the game, but the final product is well worth it.

In today’s day and age, design can make or break a product. People often make the decision to purchase one product over another, simply owing to design. There are even times in which customers purchase something just because it looks cool. This is a key concept when designing a product, and ultimately speaks to how essential it is to work with the best in the industry.
Build a Small, Winning Team
While EGGS design was a crucial part of the Airthings team, a smaller, core group of people were the masterminds behind the cutting-edge device. Since the company was established with the goal of creating reasonable, attainable technology for radon detection, their team was already available at their fingertips. If this were not the case, contacting and collaborating with the best minds for your project will take a bit more time and effort.
At no point during the creation process of the Wave, were there more than 10 people involved. The idea behind a small team allows for creativity and movement in the process. That is to say, when a limited number of people have their hands in a project, there is more control overall. A smaller group lays the groundwork for each individual member to voice concerns or opinions, without feeling left out. It is important to keep this in mind because the team was chosen for their expertise in a given subject. Their knowledge and background is pertinent to the success of both the design and implementation of your smart home product.
Design Process
Once Airthings paired with EGGS, they were able to set some boundaries, in terms of the physical detector. First, it needed to work both with and without a smartphone app. This is because radon levels can fluctuate in a short period of time. If someone’s smartphone dies and that person does not receive an alert, she may not realize she is being exposed to the poisonous gas. In order to mitigate this potential issue, Airthings eliminated the need to connect with a smartphone app. This allows anyone to be made aware of an alert — even children! That is to say, the additional benefit of the app is a secondary way to maintain a constant eye on radon levels.

Since alerts were not to be sent through smartphones, it was essential to find a way to illustrate levels of the poisonous gas. Display lights were the answer. With the wave of a hand, a tri-color system appears. Red signifies dangerous levels of radon, yellow indicates temporarily high levels, and green demarcates safe levels. These three colors are relatively universal in terms of warning signs, so it was easy to transpose them onto the radon detector. Airthings’s goal was to create a universally simple product that anyone in the house can understand. They achieved it through the color-coded warning system.
Next came the power source. The Wave is powered by batteries, much like a smoke detector. Electricity outages can be a cause for concern when monitoring radon levels. The radioactive gas can fluctuate at any given time, so any interruption in the monitoring can be detrimental. Luckily, batteries allow radon levels to be monitored 24/7, providing constant ease of mind. Two AA batteries are included with The Wave, and provide up to a-year-and-a-half of battery life. In addition to calming nerves, batteries are very easy to install.
A product can be extremely pleasing in functionality and design, but can utterly fail in terms of installation. If a customer is unhappy with any aspect of a product, there is a very good chance he will go online and voice his opinion. Other people will be privy to his dissatisfaction, and shy away from your product. It is a slippery slope that is best avoided. For that reason, Airthings focused on the design, use, and instillation of its product.
By utilizing a single screw on the back plate, they were able to allay any frustrations surrounding the design. From there, magnets were the simplest solution to keeping the device in place, while maintaining the ability to easily remove it. This is a very elegant solution. People truly dislike complicated installation-processes, and Airthings seamlessly removed this grievance.
Prototyping and Testing
The design was locked down, but the physical material the device was to be constructed with was yet to be determined. The feel of the Wave had to exactly match that of its looks: sleek, elegant, and simple. Without this key element, the product does not live up to expectations, and the psychology of the shopper (i.e. the way people shop) is essential in any product design. People are attracted to aesthetically pleasing products. In turn, they also love the appeal of a product that just feels good.
Once the materials were narrowed down, the next step was to test them for real-world functionality. Would it hold up in a home with an exploring toddler? How about a place that allows pets? These questions, in addition to a slew of others, needed to be answered before a material could be officially selected. Testing is a very expensive endeavor, so it was ideal for Airthings to test internally amongst their own team, for the sake of cost-savings. Moreover, it reduced the amount of time in between tests because the product was already in the office.

Airthings’s amazing team was already an expert in some way, regarding the creation of a radon detector. These individuals were then able to determine what worked and did not work in a real-life scenario, and explored a variety of situations that may arise in every day life. Thanks to rigorous testing, they were able to extract all of the materials that worked best, and put forth a durable, practical device.
Marketing
Today’s technology allows for businesses to market themselves in vastly different ways than they could do even a decade ago. Airthings realized digital image-renders, instead of standard product photography was a better and more flexible use of their marketing dollars. A physical photo shoot can be a costly and time-consuming endeavor. Rather than wasting precious time and money, digital image rendering is the best route to take for procuring images of a product. Since there was not anyone on staff that had these skills, the task was outsourced to Poland. In fact, almost everything on the Airthings.com website is renders, not actual images!
Launch and Follow-Up (Launch Semi-Soft!)
A big piece of advice: do not invest in a big, splashy product launch unless you are 100% certain it will be an absolute hit. Keep in mind, if this is your first smart home product, then there is no way to be 100% certain. Creating a big splash can be costly and pretty unnecessary. We launched at CES. This trade show is extremely well-known in the industry. While it was some investment, it has been extremely useful for the sake of PR. Plus, pre-orders of the Wave have skyrocketed. On the other hand, Airthings did not spend a lot on making an awesome marketing video. Take a moment to watch their video here, There are tons of ways to make fantastic marketing material without a huge budget, and Airthings’s video does just that. Other ways to market yourself include social media and blogging. The Internet is your friend — use it to your advantage.
Conclusion
Creating your own smart home device has a relatively straightforward process. Finding a gap in the market and conducting proper research is the first step. Compiling a team of experts, and pursuing an incredible design are next. Third you must find the best material for the prototype and test it in-house. Create a solid website and marketing material. Remember that you do not need to invest a lot to make a professional video or write phenomenal content. In fact, you should not plan a splashy launch unless you are absolutely certain your product will succeed. Smart home devices are here to stay, and like Airthings, you can create the latest home technology with an idea and a strong team!
The post How to Make a Smart Home Device appeared first on Airthings.
]]>